This tutorial is very complex and very difficult to do, so I don't recommend the inexperienced to follow it because they might damage their terminals. This guide explains the steps to follow to make a ramdisk necessary for the PwnageTool application to start your terminal without any problem. The tutorial only works on iPhone 4, so don't follow it if you have another device because it won't work in any way.
If you follow this tutorial and install iOS 4.3 made with PwnageTool you will have a tethered jailbreak. The baseband of your terminal should not be updated to the value of 04.08.00.
Follow this tutorial at your own risk!
there it is what you need to do this tutorial:
- PwnageTool 4.1.2;
- iOS 4.3 beta 1 for iPhone 4;
- the new bundle for PwnageTool that jailbreaks iOS 4.3 beta 1.
Step 1
Download PwnageTool and the new bundle on your Macs.
Step 2
Right click on PwnageTool, select Show Package Contents, Go Contents> Resources> FirmwareBundles where you will copy the file iPhone3, 1_4.3_8F5148b.bundle extracted from the archive of the new bundle.
Step 3
In the same folder opened using the method above, navigate to Contents> Resources> CustomPackages where you will copy the file CydiaInstaller.bundle based on which Cydia will be installed during the restore.
Step 4
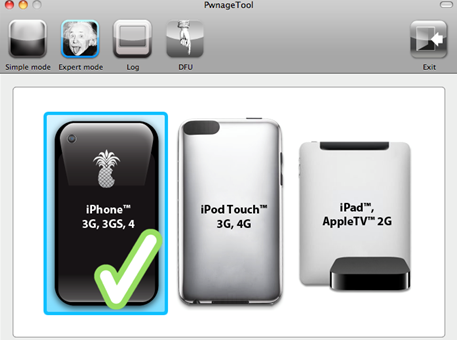
Open PwngeTool and make a new custom ipsw for iPhone 4 using Expert Mode. I will not detail the steps because a user with advanced knowledge already knows them.
Using the steps below you will be able to make a ramdisk with the help of which you will be able to restore using the custom ipsw made using the instructions above. The process is complicated and you have to follow the steps closely, otherwise you won't be able to make a good ramdisk and you won't be able to restore using it.
For this process you need ramdisk maker, xpwntool and ldid.
Step 1
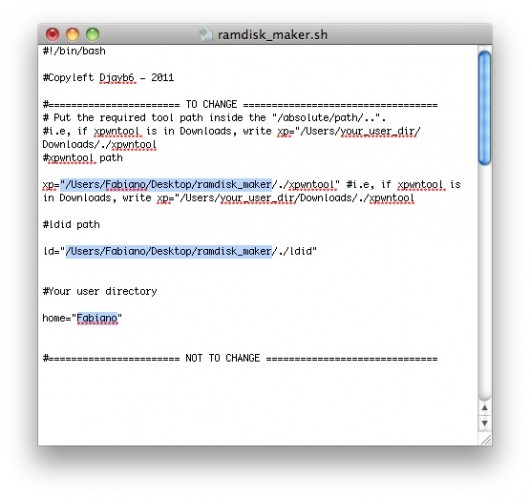
After you have downloaded the 3 programs, you will have to open ramdisk_maker.sh with a text editor and you will have to modify the paths to xpwntool and ldid, as you can see in the image below. The simplest would be to have all the files on the desktop because it is easier to work with them.
Step 2
Open the Terminal application on your Mac, type and press enter su root to get administrator access then type:
/ Path / ramdisk_maker.sh
/ Path / being the location where the ramdisk_maker.sh file is located on your Mac.
Step 3
From here on you will have the steps listed in ramdisk_maker. You must first create a file on the desktop called My_Ramdisk where you will have to copy the ramdisk from iOS 4.3 beta 1. For this you need to make a copy of the ipsw for iOS 4.3 beta 1 and change its extension to .zip. After changing its extension, look for one named among its files 038-0408-002.dmg which you will copy to the folder My_Ramdisk done previously.
Step 4
Return to the Terminal window where you will find a new list of instructions. Open the options.plist file in the ramdisk_maker folder using a text editor, TextWrangler from the Mac AppStore would be ok. In the newly opened file, look for the entry SystemPartitionSizand change the value from there to 1116. If this value is already entered there, then do not change anything.
Under the SystemPartitionSize entry you will find another one for baseband named UpdateBaseband which must be left with the entrance /false under it.
After you have modified the options.plist file, you will have to copy it to the folder My_Ramdisk done in step 3.
Step 5
In the Terminal you will notice that the procedure for creating the new ramdisk has started and the final result should be a file named final_ramdisk.
Step 6
Copy the file final_ramdisk to the desktop and rename it to 038-0408.002.dmg, the new file 038-0408.002.dmg the custom ipsw for iOS 4.3 beta 1 made with PwnageTool must be copied. Locate this custom ipsw, change its extension to .zip, extract the archive and search for the file 038-0408.002.dmg in her. Copy your file 038-0408.002.dmg (the one renamed from ramdisk_final) over the one from the archive by selecting the replace option.
After you have finished copying, select all 9 files in the unzipped folder, right-click and select Compress the 9 rows selected.
After you have created the new archive, rename it to iPhone_4_custom.ipsw.
After you have done these steps, we return to iTunes where you can load the new custom ipsw. Simply restore from iTunes to this ipsw, after the process is finished the terminal will start, but it will be in semi-tethered mode, so you will have to follow the steps below to start it in tethered mode and to be able to run applications from Cydia.
Step 1
Copy the file from the custom firmware folder made with PwnageTool kernelcache. release. n90 on the desktop.
Step 2
From the Firmware> dfu> folder copy the files iBEC si iBSS also on the desktop.
Step 3
Download the program tetheredboot and make a new folder on the desktop where you will copy the program plus the 3 files listed above.
Step 4
Enter the terminal in Recovery Mode and connect it to the Mac. Open the Terminal app on your Mac and type sudo sh, write the password, then type
cd Desktop / tetheredboot
./tetheredboot kernel ibss
You will notice on your screen that an exploit is being executed, then you will have to enter the terminal in DFU Mode. After you put it in DFU Mode, the rest of the exploit will be implemented and then the terminal will start itself in tethered mode and you will be able to use Cydia.
If you followed the steps correctly then you should have a jailbroken iPhone 4 on iOS 4.3 beta 1.


