Last night iH8sn0w launched iFaith, a new program for Windows users that allows saving the SHSH file for the iOS version installed in our terminal. Basically, if you have SHSH iOS 3.1.2 in your terminal, you can save SHSH for that version even if Apple no longer saves. iH8sn0w's program is very useful for those who have an old version of iOS in their terminal and want to save SHSH for it. You can save SHSH ONLY for the version of iOS that is now installed in your terminal and NOT for old versions.
You don't need iFaith if you already have SHSHs for iOS versions 4.x or 3.x. SHSH saved with iFaith is NOT compatible with TinyUmbrella and those saved with TinyUmbrella or in Cydia are NOT compatible with iFaith. Your terminal does not have to be jailbroken to follow this tutorial.
iFaith only works on terminals that can be exploited with limera1n, iPhone 3G, iPod Touch 2G and iPad 2 are excluded from this list. That being said, here are the devices that are compatible with iFaith:
- iPhone 3GS;
- iPhone 4;
- iPod Touch 3G;
- iPod Touch 4G;
- iPad;
- Apple TV 2G.
Step 1
Downloaded iFaith by here and unzip the program on your desktop.
Step 2
Enter your terminal in DFU Mode by following the steps below:
- hold down the power button for 3 seconds;
- without letting go of the power button, press the Home button for 10 seconds;
- after the 10 seconds pass, release the Power button and the phone should already be in DFU Mode.
Step 3
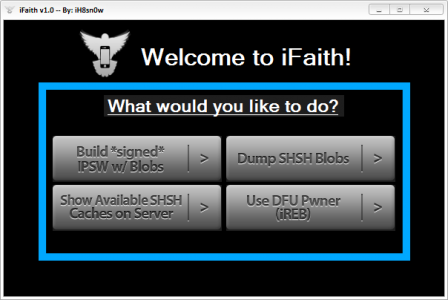
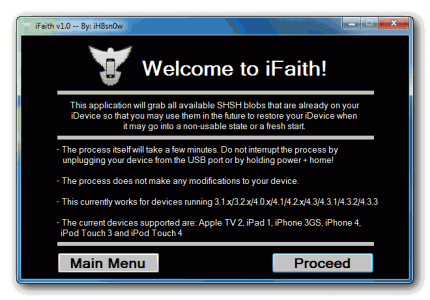
After the terminal has been successfully entered into DFU Mode, press the button Dump SHSH Blobs to start the SHSH extraction process. You will be greeted by 2 windows with information about those who made the program, click proceed in the first instance and Let's go to skip the second message.
The SHSH saving process can take up to 5 minutes, so be patient.
Step 4
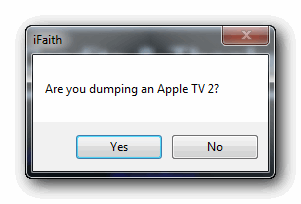
After passing these messages you will be greeted by a third one that will ask you if you save SHSH for an Apple TV 2G, the answer is NO if you don't do that.
Step 5
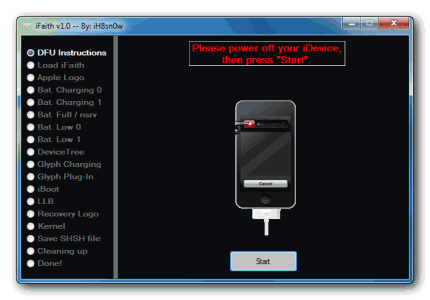
After pressing NO, you will be taken to a new menu where the process iFaith goes through when saving an SHSH is detailed. In the middle of the screen is an iPhone terminal, under it a Start button, press it if your terminal is in DFU Mode. If it is not in DFU Mode, then go back to step 2.
Step 6
iFaith will run its process and when it finishes, a window will open asking you to set the location where your SHSH will be saved. I recommend that you save it on your desktop and then in a folder where you can take it in the future. iFaith also saves the SHSH online on a certain server where you can retrieve your SHSH again.
That's all about saving SHSH, I'll make a tutorial for using it a little later.


