Because lately I have noticed that many of you are asking how to create an Apple ID (iTunes account) without using a bank card, I thought I would republish an old tutorial that is valid today in exactly the same format. Today I followed him and made an Apple ID in App Store Romania, so it is valid and can be used by any of you.
Step 1
Open iTunes on your computer and you should see a flag at the bottom left of the first page. Normally it should be that of Romania, but if you see another flag, click on it and from the newly opened list select the flag of Romania and the iTunes Music Store Romania will be accessed.
Step 2
At the top you will see a menu with several categories: Music, App Store, Books, Podcast, etc. but select App Store.
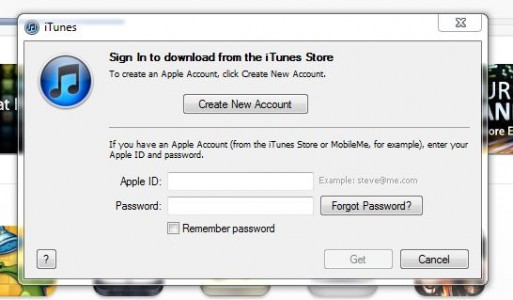
After entering the App Store, on the right side you will find several menus with application categories, scroll down until you find a category called Free Apps. There, move the mouse over the name of the application and next to it you will have a button called Free. Press that button and you will be asked to log in to the App Store. Press the button Create New Account from the middle new menu.
Step 5
A presentation window will appear, click continue, then accept the terms and conditions. In the next window you must fill in all the boxes, ATTENTION! enter a valid email because you will receive a link to confirm the account, and the email will serve as the user.
Step 6
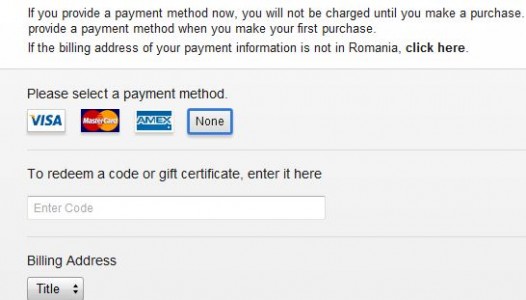
If you have followed the steps carefully up to this point, then on the newly opened page, at the top next to the various icons of the cards available at banks, you will also have an option called None that you will tick and then you will complete the rest of the boxes except those with redeem. You have to be careful because you have to enter a real address from Romania. If you have chosen to open the account in another country, you must enter a real address from that country. After you have filled in all the boxes, press the Create Apple ID button.
Step 7
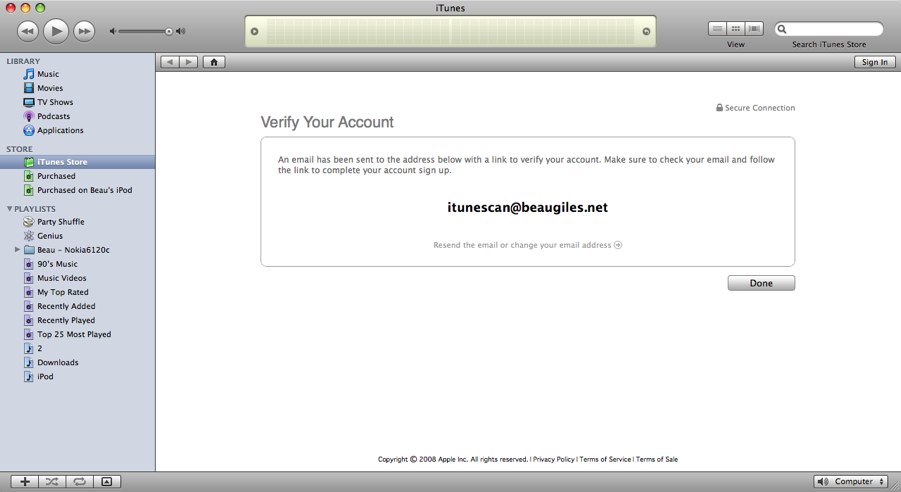
If you managed to fill in all the boxes correctly, you will receive a message like the one below. Press Done and you will receive a confirmation link in your email that you must open from your email inbox and it would be good to also look in the Spam folder if you do not find it in the Inbox.
Step 8
After clicking on the confirmation links received in the email, a box should open in iTunes where you will be asked to log in.
Congratulations, you now have an iTunes account!


