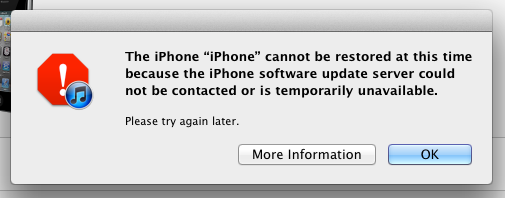
Starting with iOS 5.0.1, the restore process became extraordinarily complicated and TinyUmbrella became completely useless in the face of the security measures imposed by the Apple company. At the moment, using TinyUmbrella and TSS Server to restore an iDevice to iOS 5.0.1 with SHSHs will result in error 11 or error 3014 regardless of whether you put the device in DFU Mode or not. Fortunately, there is a solution for this problem and it is called redsn0w. This program allows users to use SHSHs to restore to iOS 5.x without problems but with more headaches. sn0wbreeze is just as useful so you can use it without any problems.
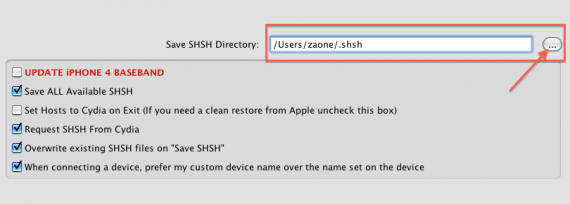
First, download TinyUmbrella available here for your operating system. After downloading the program, open it and connect the iDevice to the computer. Now in TinyUmbrella go to the Advances menu and there check Request SHSH from Cydia (uncheck Save ALL Available SHSH) and change the location where your SHSHs are saved. By pressing the button on the right you will be able to select a location on your computer where the SHSHs are saved and I recommend you to save them in a folder on your desktop to be sure that you can find them quickly in case of need.
Now that you have saved the SHSHs, let's move on to the most complicated part. In the tests I did, it proved that a custom ipsw with baseband kept works without problems every time, so I recommend you to use this method. This is the only method to restore to iOS 5.0.1 and it only works if you have SHSH saved for those versions of iOS.
The tutorial applies to the following iDevices:
- iPhone 3GS;
- iPhone 4;
- iPad 1;
- iPod Touch 3G;
- iPod Touch 4G.
Step 1
Download the latest version of redsn0w available here.
Download iOS 5.0.1 available here.
Step 2
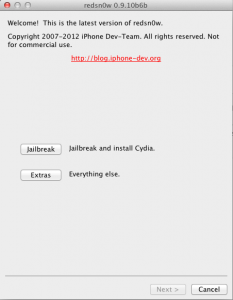
Open redsn0w and access the Extracts menu.
Step 3
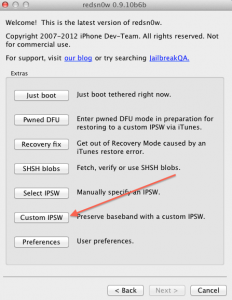
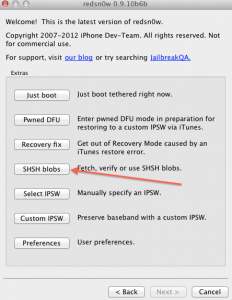
In the Extras menu, press the Custom IPSW button and you will make an ipsw that will keep the baseband intact during the restore process. After pressing the button, a window will open in which you will have to select the iOS 5.0/5.0.1 ipsw downloaded in step 1.
Step 4
After redsn0w finishes the process, you will have an ipsw with the name NO_BB made in the folder where you saved redsn0w.
Step 5
Now we have to "paste" the SHSHs saved with TinyUmbrella of your new ipsw. From the same menu where you have the Custom IPSW option, select the option SHSH Blobs.
Step 6
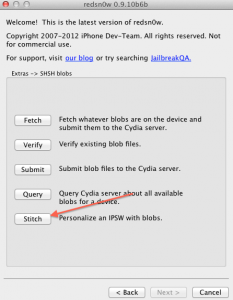
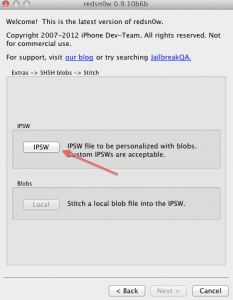
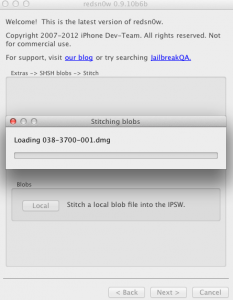
In the new menu, select the option Stitch. Now you have to select the IPSW option to load the ipsw to which you want to paste the SHSHs and here you have two options. If you do not want to keep the baseband intact, then select the original ipsw of iOS 5.0.1. If you want to keep the baseband intact, then select the ipsw with the name NO_BB.
Step 7
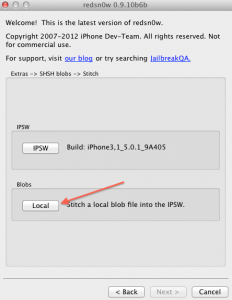
After you have selected the ipsw, you must also select the location of the SHSH and to do this you must select the Local button. After pressing the button, you will navigate to the location where you saved the SHSH and after selecting it, redsn0w will start creating the new ipsw that will have the name of the number of the SHSH saved by you.
Step 8
To use the new ipsw you have to enter your iDevice in Pwned DFU Mode. To do this, you must connect the terminal to the computer, return to the main menu of redsn0w, select the option Extras then Pwned DFU and follow the steps below:
- hold down the power button for 3 seconds;
- without letting go of the power button, press the Home button for 10 seconds;
- after the 10 seconds pass, release the Power button and the phone should already be in DFU Mode and redsn0w will start implementing the exploit.
Step 9
After putting the device in Pwned DFU Mode, open iTunes and using the shift + click on restore/option key + click on restore combination, select the ipsw with the SHSH number and let iTunes do its job. After everything is finished the device should display the activation menu. redsn0w does NOT do hacktivation.
If you encounter any error during the restore process, then you must repeat the above steps and make another ipsw. I recommend you to bookmark this tutorial because you will definitely need it in the future.


